3D Rendering for ARES Commander with ARES Render Plugin
- 18/10/2019
- Posted by: Graebert
- Category: Product NewsTips & Tricks
ARES Render, is a plugin for ARES Commander that will allow us to render in real-time and generate high-resolution photo-realistic images quickly and easily, thanks to the powerful tools offered by this plugin.
Let’s LEARN MORE/Let’s FIND OUT MORE
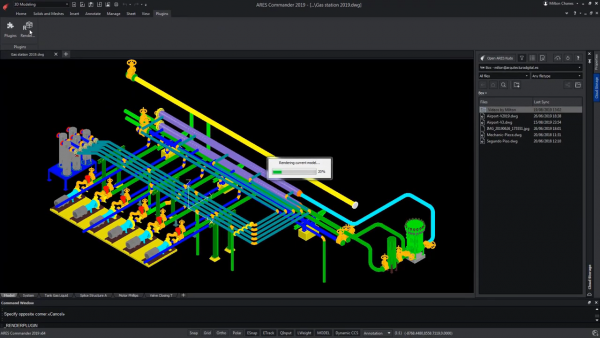
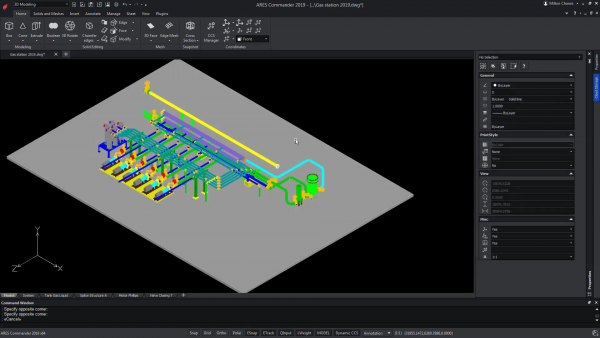
From ARES Commander, in the PLUGINS tab, we will be able to easily send our model to ARES Render (which previously has to be installed).
With the ZOOM tool, we can choose between different points of view.
With the mouse wheel, we can approach/MOVE CLOSER.
We can also ORBIT by combining Shift and the right mouse button.
Even we can use this icon …

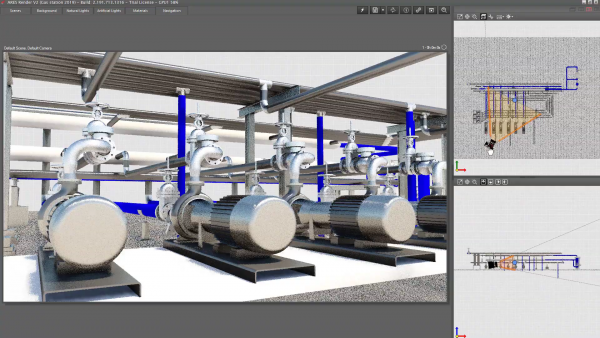
ARES Render offers us a real-time preview, where it uses all the power of our graphics card.
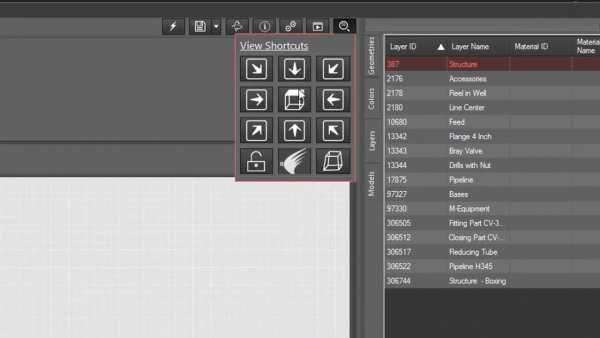
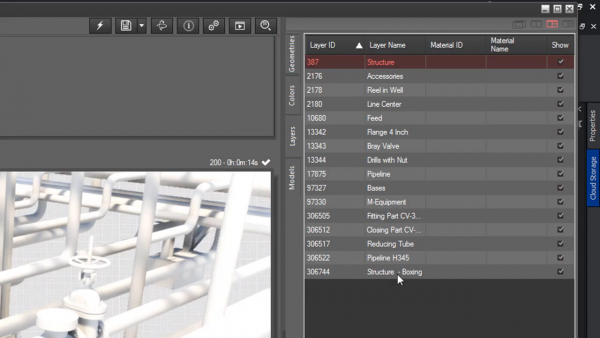
In the side menu, we have the possibility to choose between the layers of the drawing.
We can see that the MATERIALS tab is selected and therefore at the bottom, we have access to the material library.
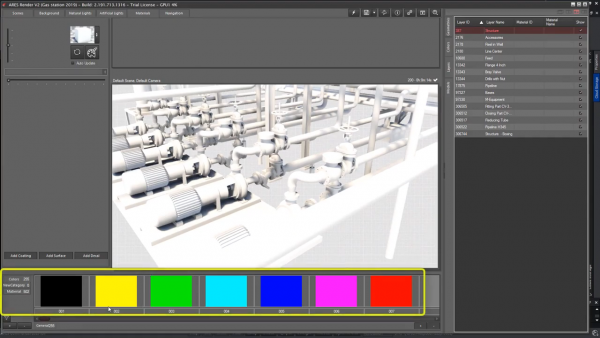
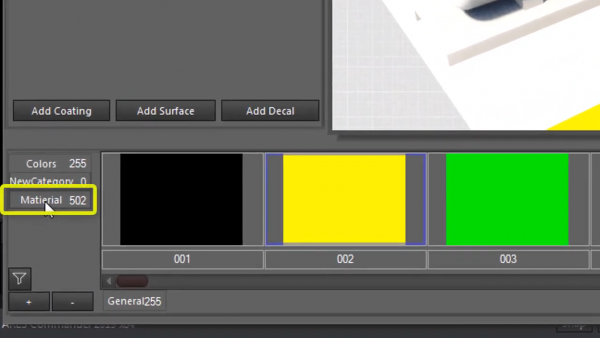
The first thing we see is a palette of 255 basic colors in CAD, by the way, that we can easily drag and add to a layer.
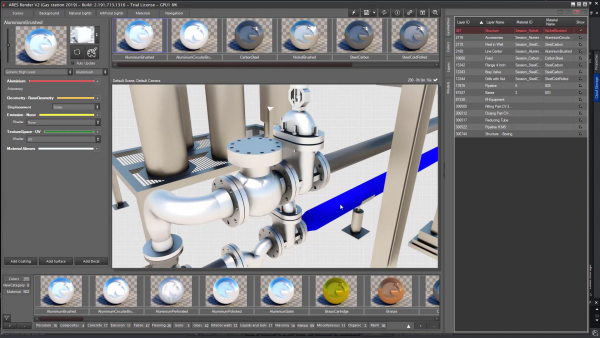
Additionally, we can go to the MATERIALS category, where we will find subcategories with many materials, ready to be used.
We can scroll sideways, to choose in this case a type of metal and drag to the layers section. Even replacing an existing one.
This action can be repeated for all layers of the drawing.
With this icon, we can know all the categories of the MATERIALS section.
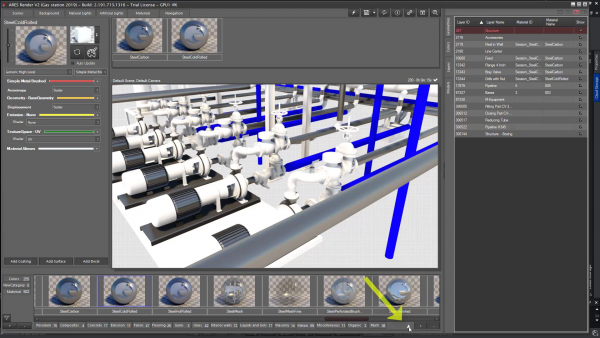
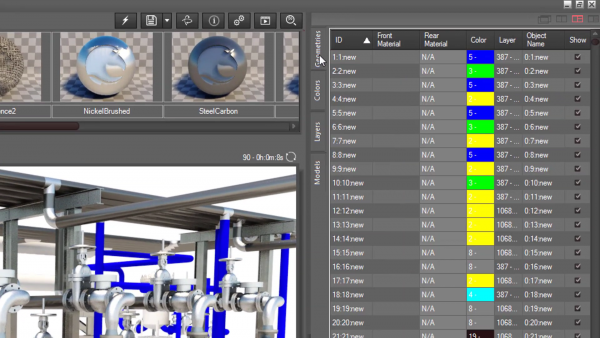
Pay attention to this layer that is assigned a specific color, blue (number 5).
These are elements in the drawing.
We can easily drag color and replace the existing one assigned to the layer.
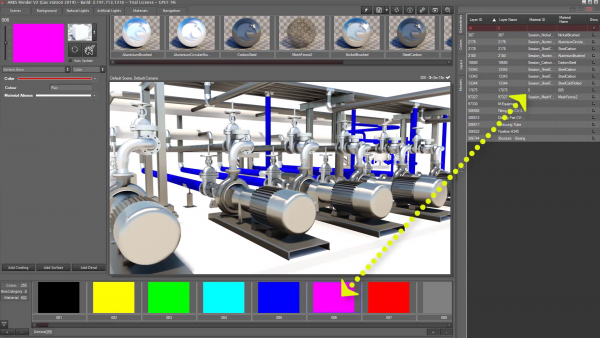
It automatically changes for all objects that are in that layer.
On the other hand, we could drag a material over one of the elements of the drawing.
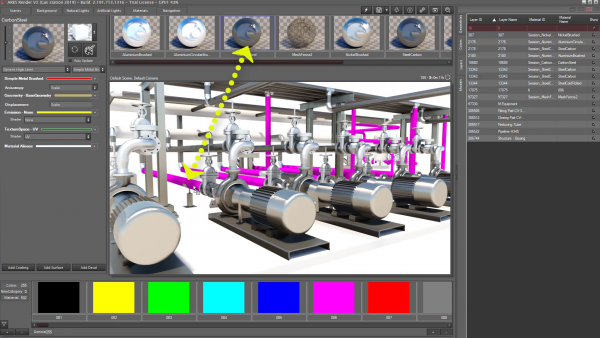
We can see that it adds the new material to all the elements that share the same layer of the selected element.
Now, we will change it again to the original color, blue.
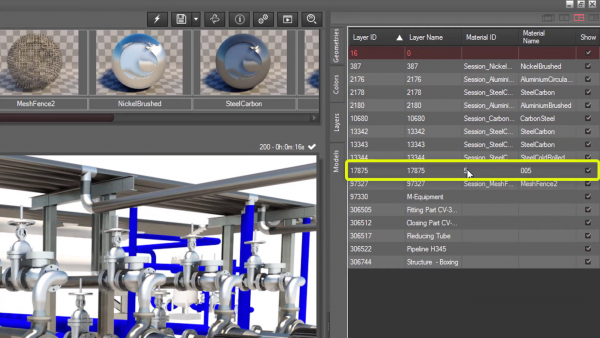
Select the GEOMETRIES tab of the palette.
Again we will drag the material over one of the ducts of the drawing.
This time, the result is different, since the GEOMETRIES tab serves as a filter to assign materials on single objects, without affecting the layer.
The order of the tabs that appear in this palette, determine the priority at the time of rendering. When you do not find material in GEOMETRIES, look for it in the following tab, so until you find one. If you find it in the LAYER tab, you will be assigned the corresponding material.
Do not forget that ARES Render is not showing all the time, a real-time render with materials and lights applied, which will facilitate the understanding of the model.
In this case, there is no plane that serves as “ground.”
We realize THIS because there are missing SHADOW CASTS, while we do see our own shadows and cast between the pipes.
We are going to add a floor in ARES Commander …
We create a box that will serve as a floor.
We save the changes and see how the model is updated in ARES Render.
Now we assign a material to the ground. We can drag it directly or assign it per layer.
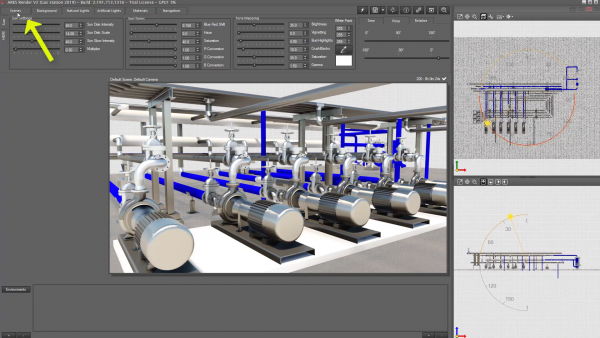
From the NAVIGATION tab, we can relocate the camera quickly and intuitively. Either from a plan or front view.
The NATURAL LIGHTS tab will allow us to configure natural light and determine where we want the light to come from.
Being able to observe in real-time THEIR own shadows and cast in the model.
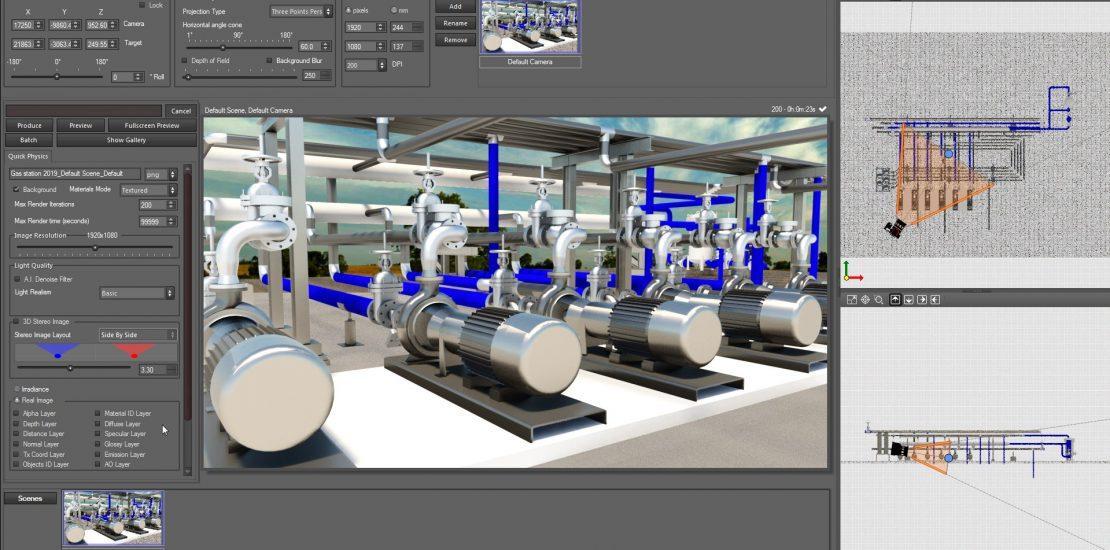
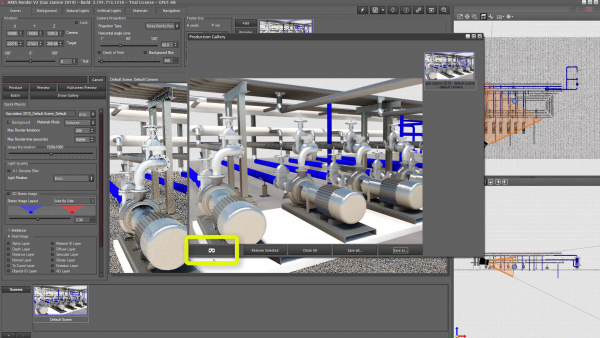
If we wish we can render a view to create an independent image in high resolution. To do this we must go to the SCENES tab.
Press PRODUCE and a bar indicate the rendering process. Among the options, we can choose the format, in this case, PNG, and other necessary features in such a render, such as resolution for example.
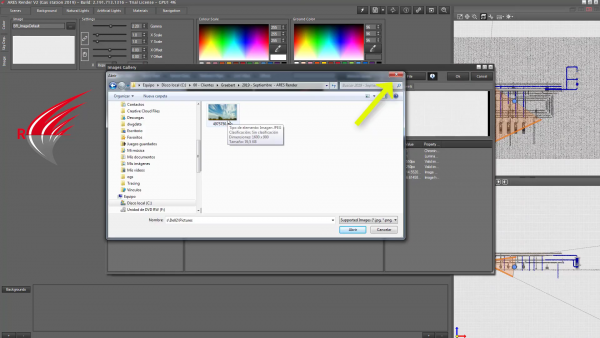
After finishing, ARES Render offers us the gallery with all the views rendered. In this case one. The window offers buttons to save the active view, or all (in case there is more than one), as well as other options available such as the creation of stereo images.
On the other hand, from the BACKGROUND tab we can define a background COLOUR, or an image.
You can also use 360º images.
In this example the background is white but we will change it for a landscape photo from our personal library.
There are many options we have to share a project with ARES Render either through several images from different points of view, and even with the creation of films with “virtual” walks through the scene, and also STEREOSCOPIC images that we mentioned before, to visualize with 3D glasses.
To be able to test all the functions of ARES Render you can download the free trial version from here.